


FAQs
About CPMS
Connect Project Management system is a cloud based application meant for planning, organizing and tracking multiple projects, clients, money and resources. It is suitable for all types of businesses. Its features allow you to keep everything in an organized way at one place. You not only manage, but also interact with your team. It is a great performance and time tracker. Reports generated via this application are very useful and could be the basis of various decision making activities which in turn leads to a better management of resources, optimized usage of time and satisfied customers.
It’s a cloud based application and you do not need to install anything on your system. All you need is an internet connection. You can create your personal domain and can login to your account from anywhere.
Management of Projects
To create a new project
- GOTO “Project > Create a new project”.
- Fill out the required information and save to create a new project.

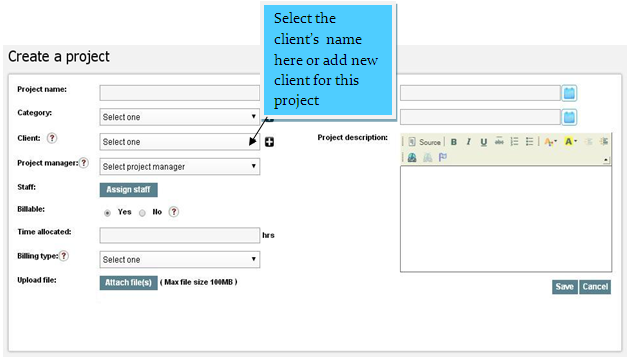
In this form you can fill all the details of the new project.
In the client field, you can select your client or create a new client cliking on "+" button.
To assign the staff for the project, click on "Assign staff" button, then the list of all your staff will open, you can select staff members easily. If staff doesn't exist, you can add a new staff here easily.
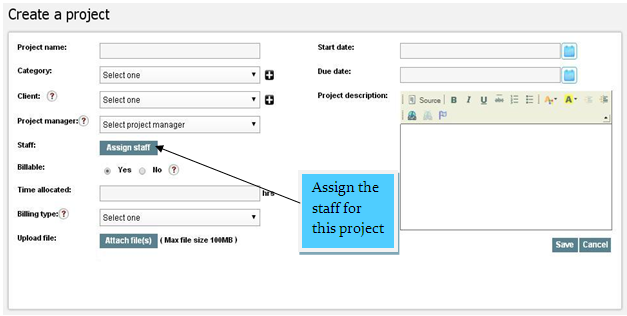
You can assign or add more staff for the project after completing the project's details. When you click on the project from the project's list, then there is an option on the right side to assign or add the staff for that project.
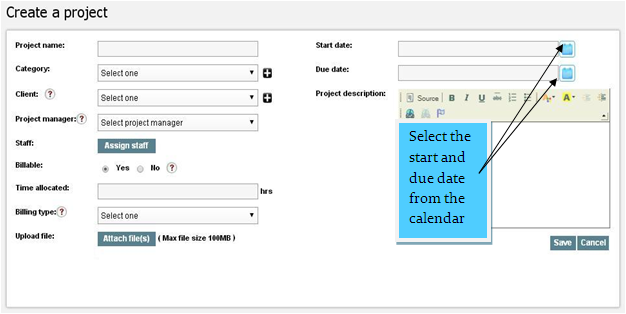
To enter the starting and deadline time of the project, you can use the calendars.
Billing type is the way of calculating the project's cost. Here are three ways-
Dedicated Staff: In the dedicated staff, you can select the particular staff members for that project and enter the no. of staff and monthly rates for dedicated staff.
Fixed price: In this section the rate of the project is fixed and you are to fill only total quoted price of the project.
Hourly assignment: In this section the rate of the project is based on the hourly work done by the staff. You can calculate the hourly devoted time of a particular project easily using timesheet of a project.

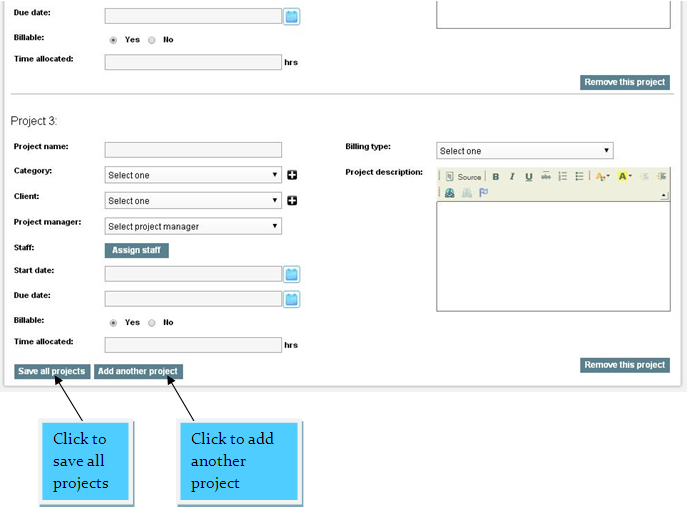
To create multiple projects-
GOTO "Projects > Create multiple projects" Fill all the information related to the projects and save all projects.
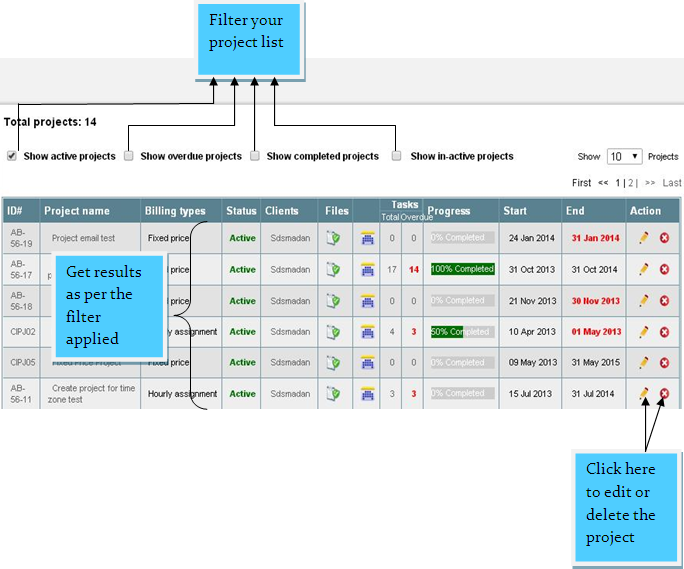
To view and edit all projects-
GOTO "Projects > All projects" Here you can filter your projects list to find a particular project and then you can edit or delete it easily.
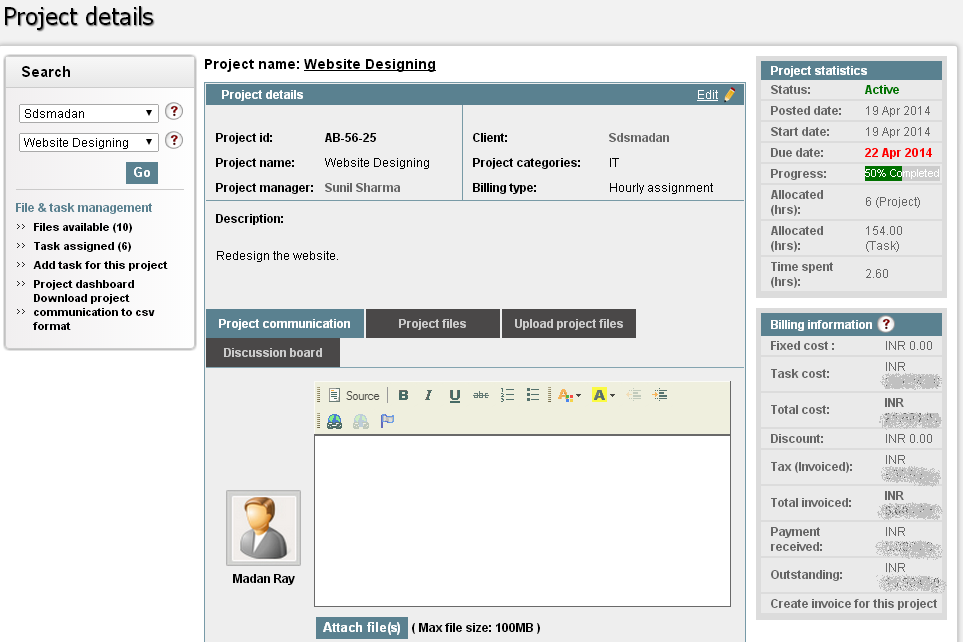
GOTO "Projects > All projects" Here is the list of all projects. Select the project on which you want to communicate.
Management of Clients
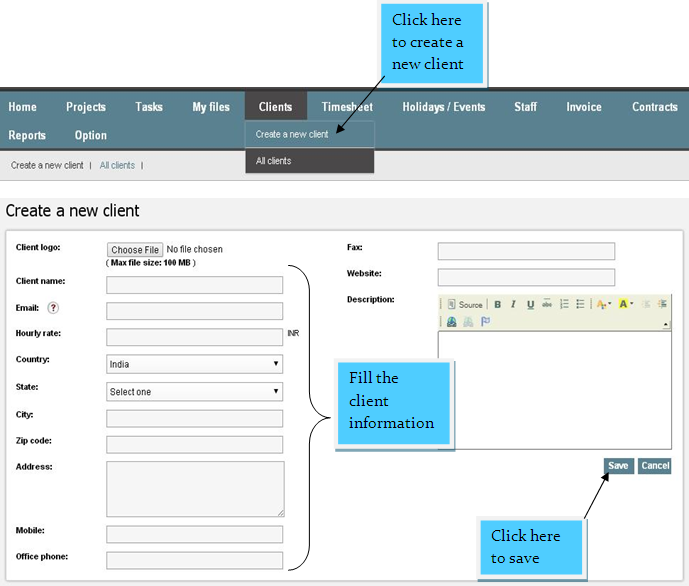
You can create a client in CPMS within just two steps-
- GOTO “Clients > Create a new client”
- Now just fill out the required information of the client and click on “save” button to create the client.
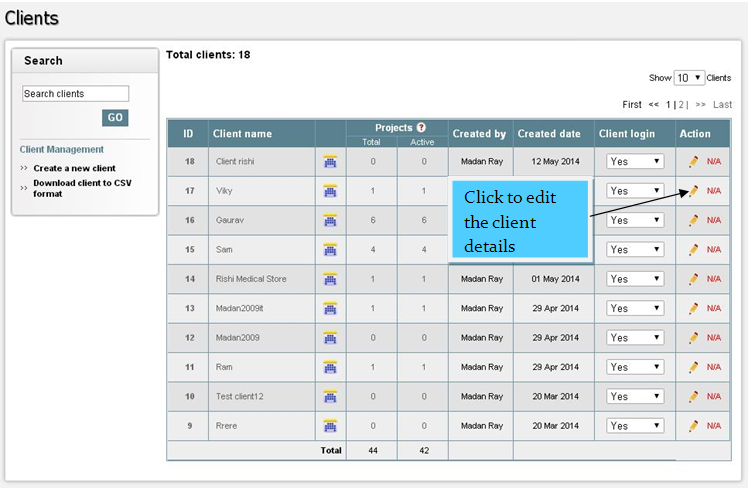
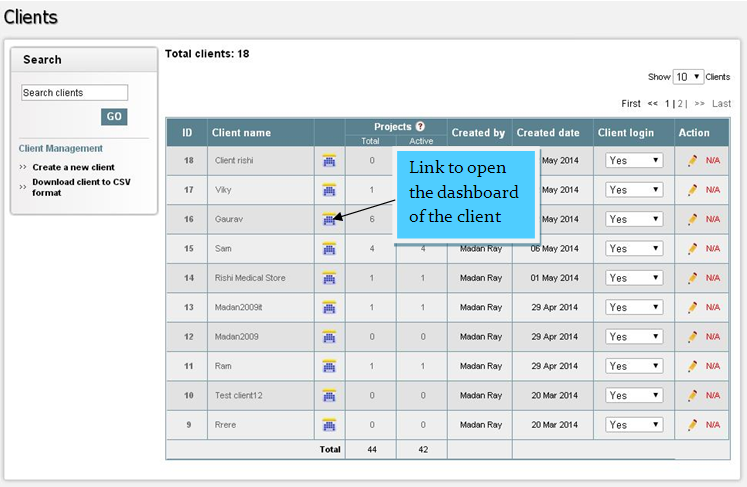
To view and edit the client details- GOTO “Clients > All clients” Here is the list all of your clients and in the "Action" bar, there is the option to edit the details of the client.
Yes! From the client's list you can view a full dashboard of a client with list of projects, tasks, status, timing, etc.
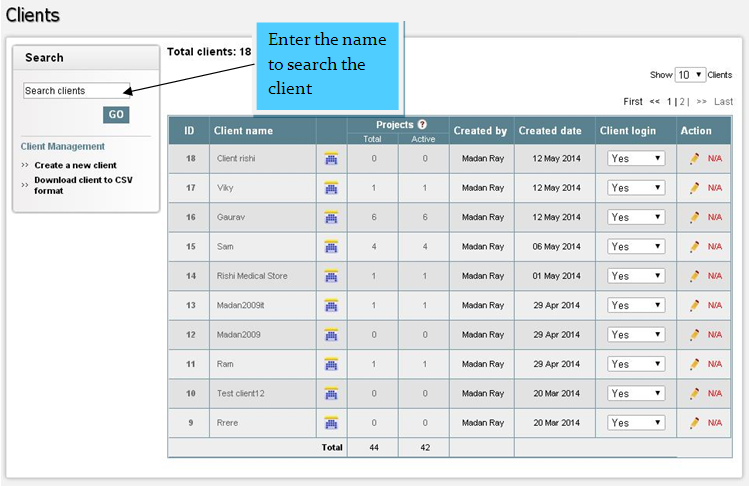
In the left side of the client list, there is a search box in which you can search the client by the name.
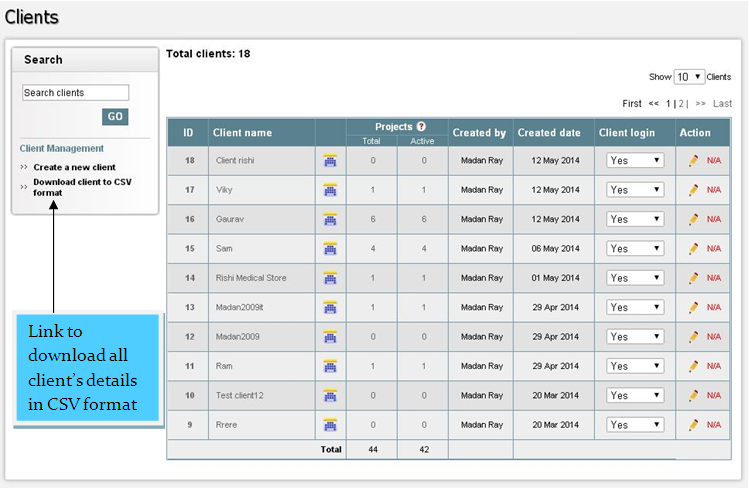
In the client management there is a option to download the list of all clients in CSV format.
Staff Management
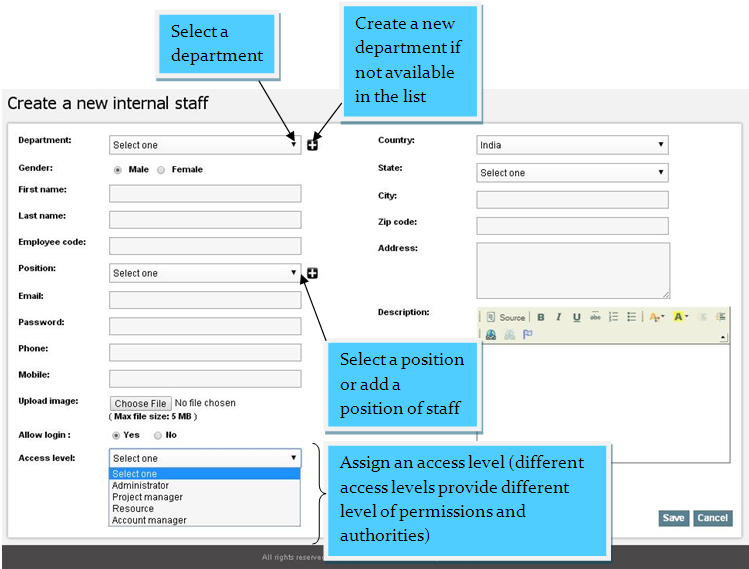
Clicking on “create a new internal staff” button you can add your internal staff information. Go to “staff > Create a new internal staff” Fill the required information and click on the save button.
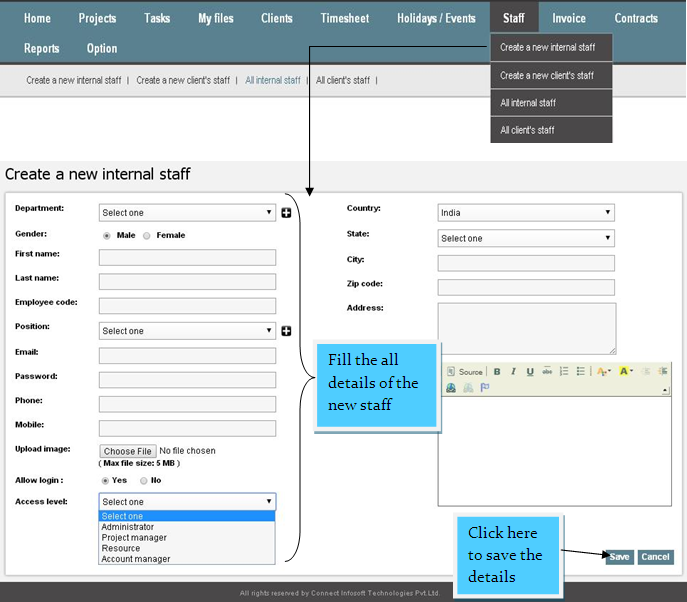
You can select or add new department and position for the staff at the time of staff creation. As well as assigned an access level to the staff of permissions and authorities.
“All internal staff” enlists all the internal staff of the organization, you can edit the staff details or delete the staff easily.
Go to “staff > All internal staff”.
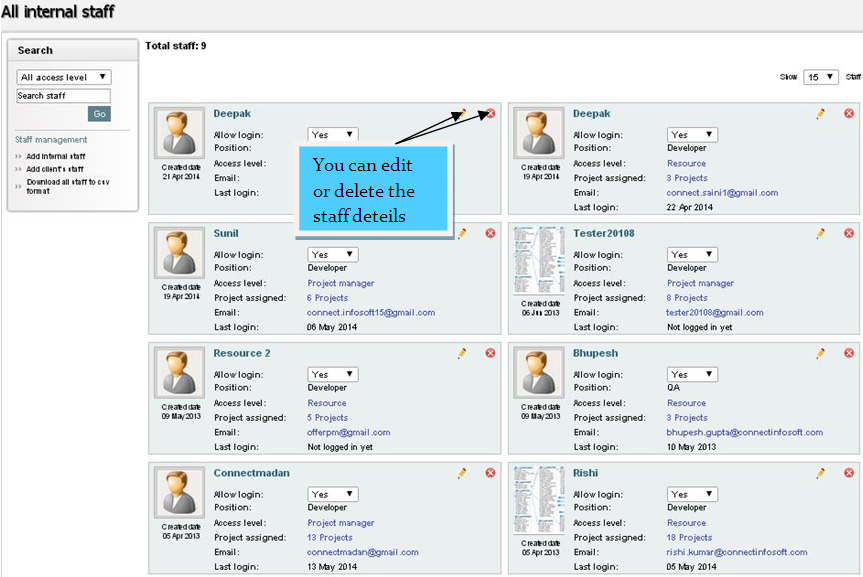
In the left of staff list, there is a search box in which you can search the staff at access level in the drop down search. As-
- Administrator
- Project Manager
- Resource
- Account Manager
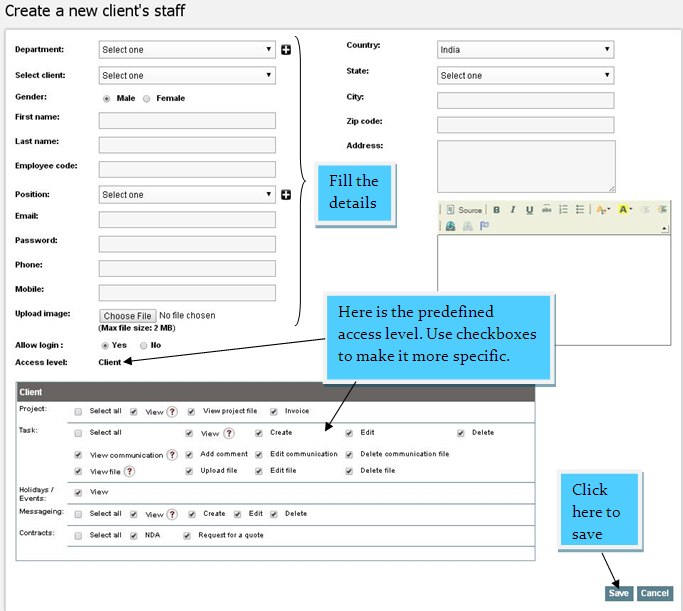
To create the client staff- GOTO "Staff > Create a new client staff" Fill the required information and click on the save button.
GOTO "Staff > All client's staff"
Here is the list of all client's staff, you can edit or delete the client's staff details easily.
Task Management
Under the “Tasks Tab” user can create single and multiple tasks for the projects.
GOTO “Tasks > Create a new task”
Fill the required information
Click on “Save” button to create the task.
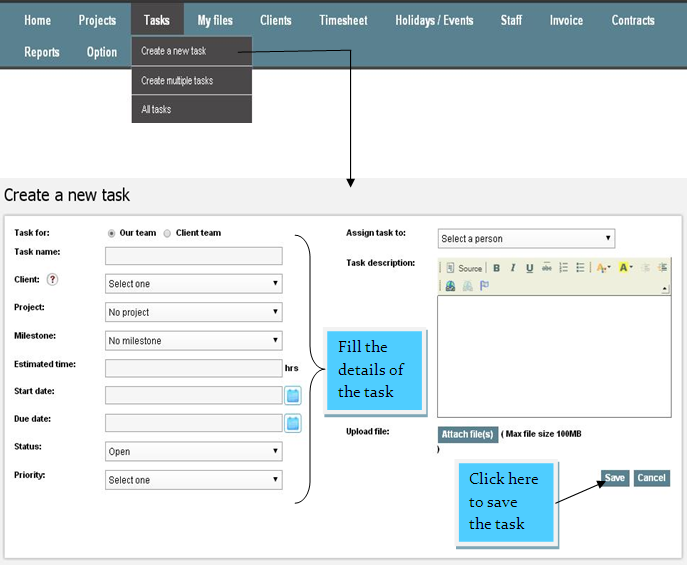
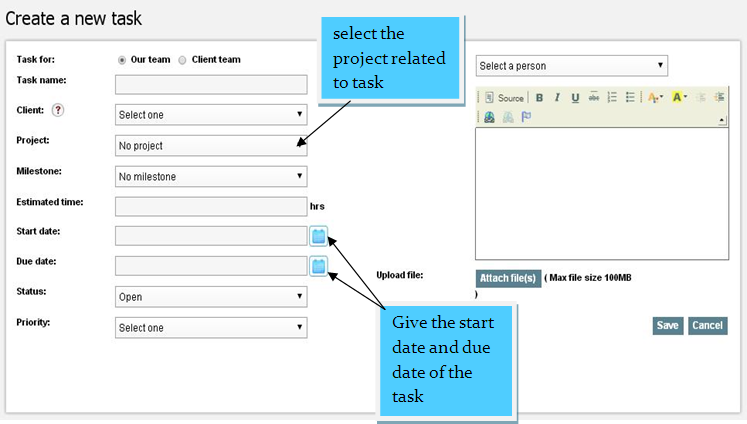
At the time of task creation, you can assign the task to your team or client team and as well as select the members of the staff for that task.
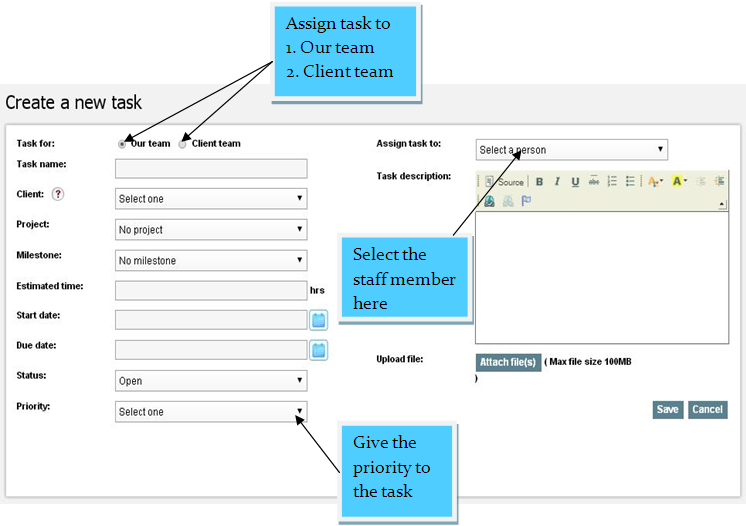
In the task creation, there is a option to select the project of new task.
To view the all task list with projects-
GOTO"Task > All tasks". Here all tasks have been enlisted. In this list of tasks you can view the following details of every task as:
Task priority by color
Task name
Project name
Assigned to
Start date
End Date
Status
Task hours
Action

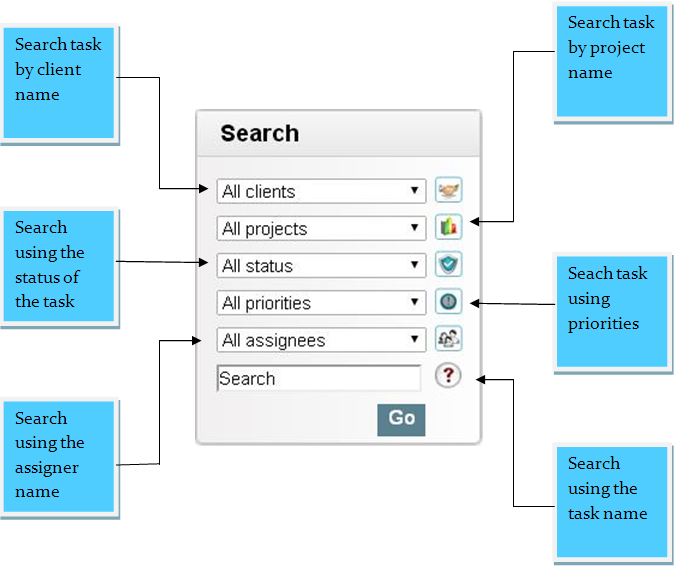
You can use filters to search tasks and on the left side there is a search box where you can Search the task in various ways as:
In the tasks list when you right click on any task name, you can perform various operations on that particular task as:
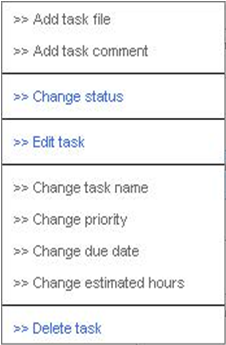
When you click on any task from the task list, then all the details of the tasks get open. There you can make comments, add file, edit the task and can do many actions in that task.
To create multiple tasks-
GOTO "Tasks > Create multiple tasks"
Here fill the details of all the tasks and save them. When you save the tasks, a mail send to the members assigned in the tasks.
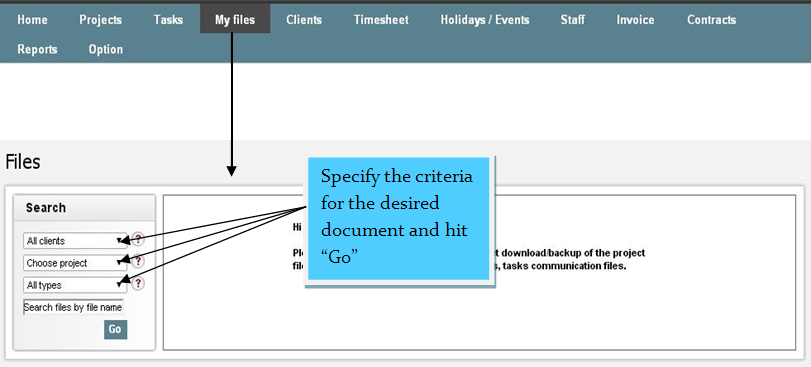
Files Management
Clicking on "My files" tab, you can get the list all of your files and documents and in the search box you can search your files using the client's name, project name and type of document (i.e. Word, pdf, image, etc.).
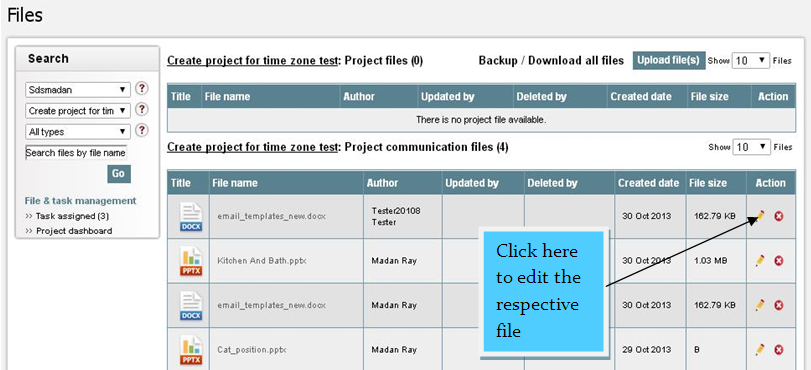
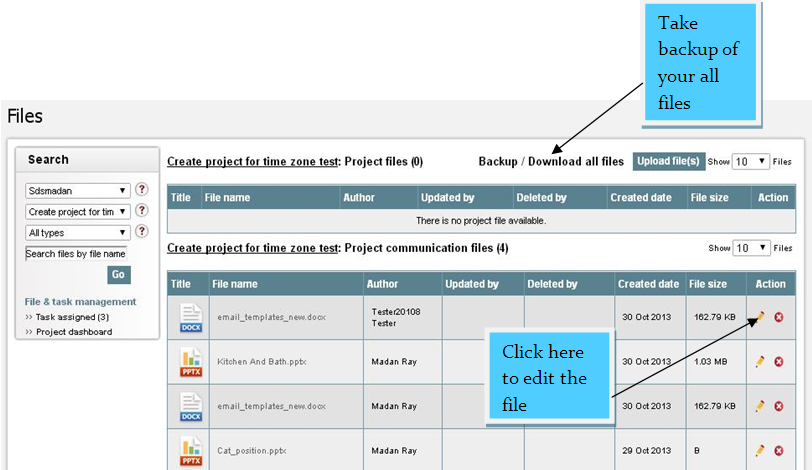
In the list of files and documents, there are options to edit and delete the files.
Yes! There is a option to take backup all of your files and documents of the projects.
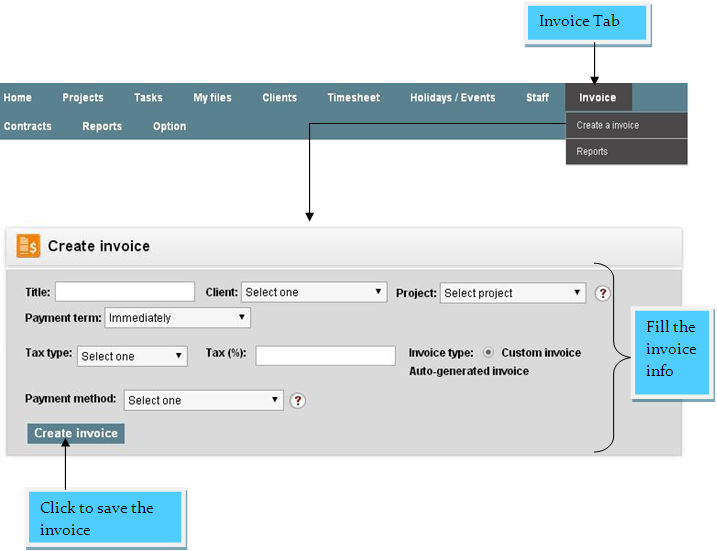
Invoice management
In the Connect Project Management System (CPMS) you can easily create the invoice of the task and project.
GOTO “Invoice tab > Create an invoice”
Fill the required information
Click to “create invoice” button.
When you click on "create invoice", the invoice with details will show to you and you can edit it. As soon as you approve this invoice, it will be visible to the client and he will get an email notification.
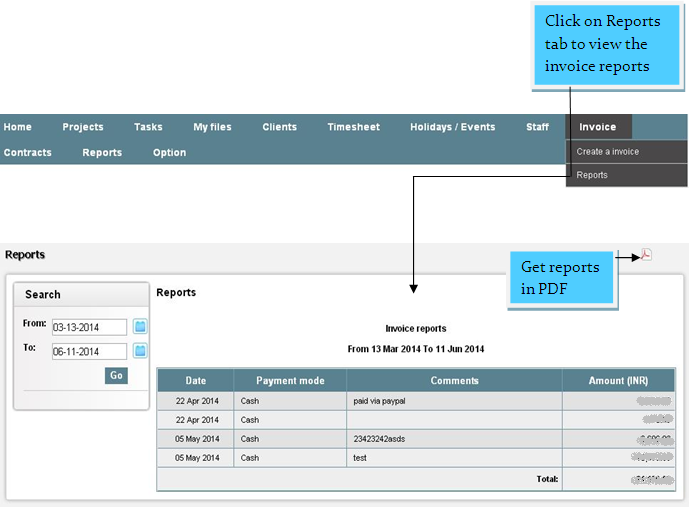
To view the invoice reports-
GOTO "Invoice > Reports"
You can save this report in pdf format.
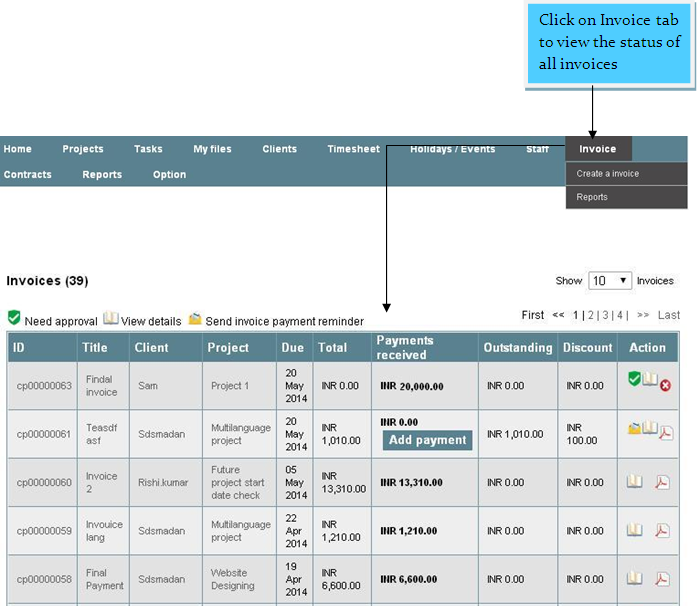
To view the status of all invoices, just click on “Invoice” tab.
To view all the invoices GOTO “Invoice tab > Reports”.
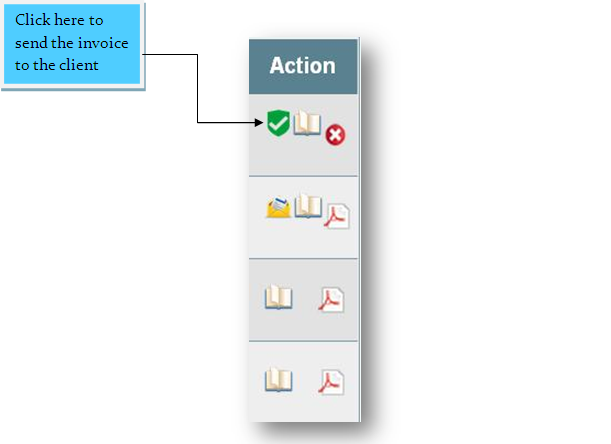
There are two ways to send the invoice to the client-
1. At the time of invoice creation when you approve the invoice, it will be visible to the client or you may leave it as it is.
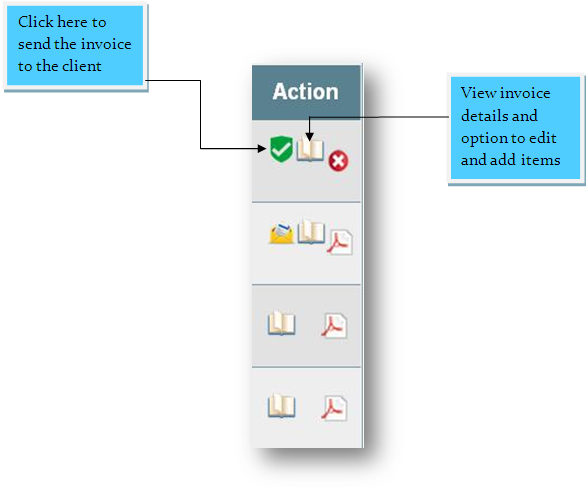
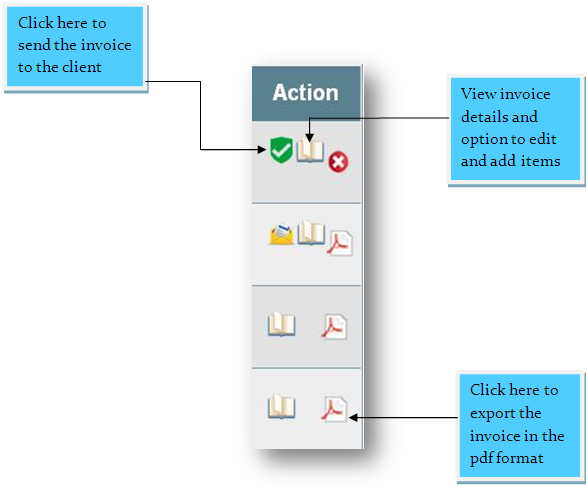
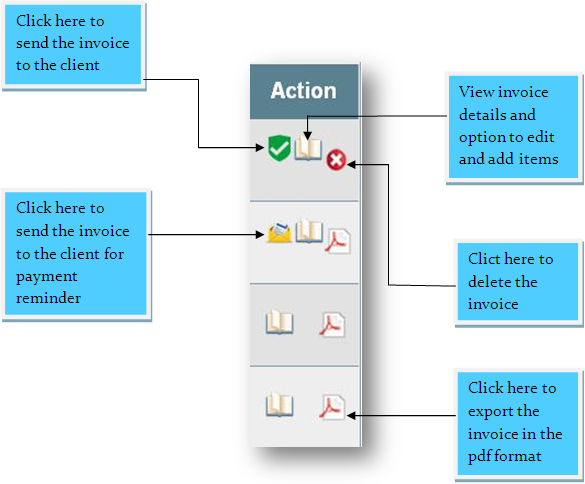
2. In the invoice list there is an option in "Action" to send the invoice to the client. When you send the invoice the client will get an email notification.
In the action there is a option to View invoice details and edit or add remaining items.
You can save the invoice in the pdf format.
If you don't get payment form the client you can send the payment reminder to the client.
Non-Disclosser-Aggrement(NDA)
A non-disclosure agreement (NDA) is a signed formal agreement in which one party agrees to give a second party confidential information about its business or products and the second party agrees not to share this information with anyone else for a specified period of time. In CPMS you can create an NDA in a very easy way.
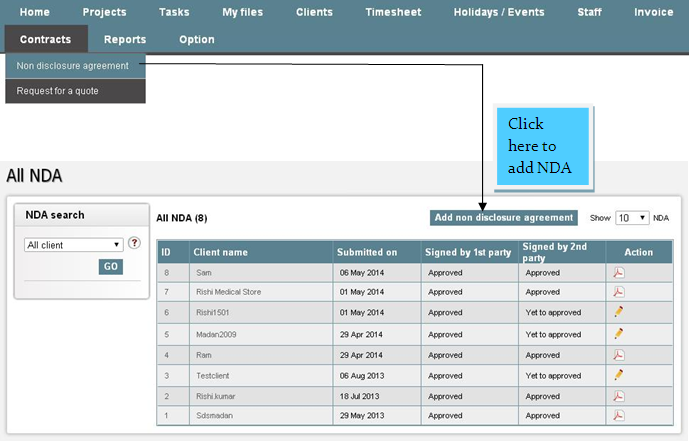
GOTO “Contracts tab>Non disclosure agreement”
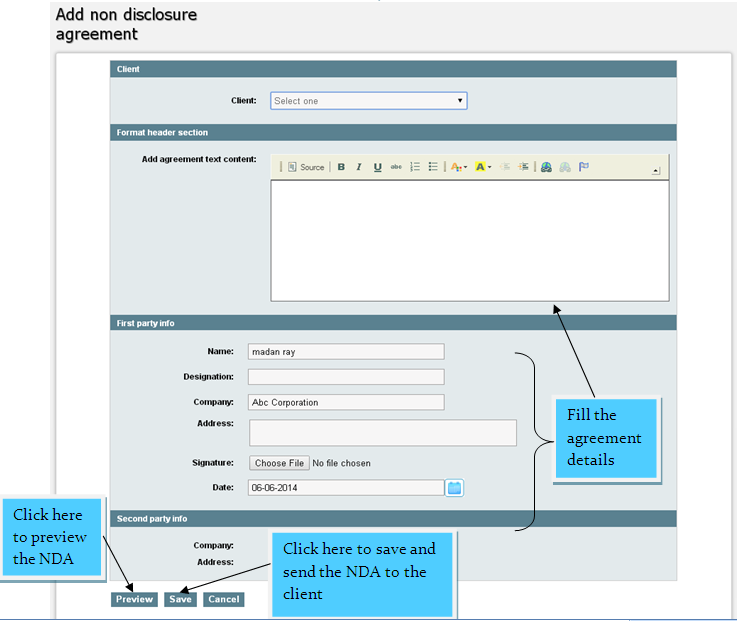
Click on “Add non disclosure agreement”.
Fill the agreement fields
Click on “Preview” or “Save”.
You can preview the NDA before its sending and when you click on save button, then NDA and an email notification send to the client for the approval of the NDA.
You can view and search the NDA of a particular client.
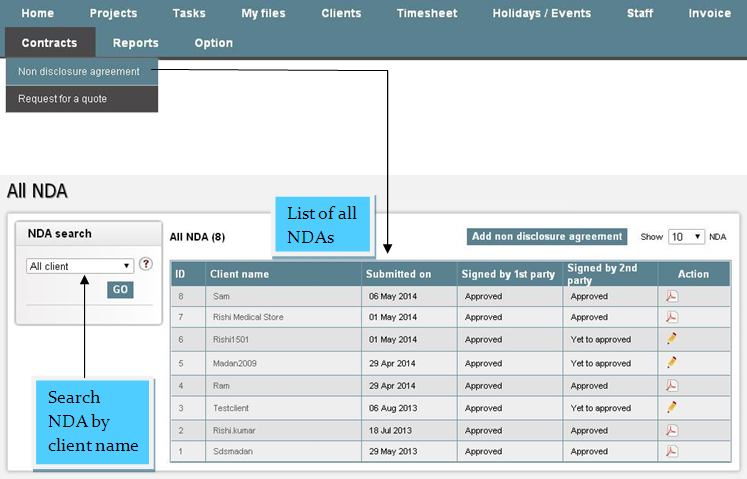
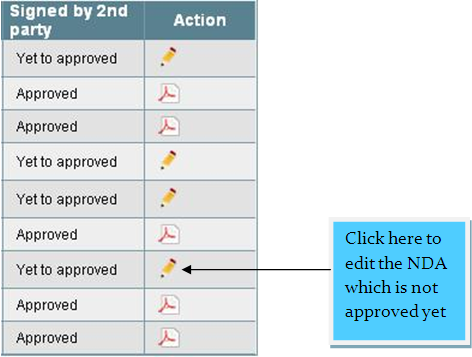
In the list of NDA, there is a option to edit the NDA which is not approved yet to the client.
You can save or export the NDA in PDF format very easily.

A request for quotation (RFQ) is a standard business process whose purpose is to invite suppliers into a bidding process to bid on specific products or services. CPMS also provide this service to the clients. The client can make a request for quotation to you. To view the request for quotation-
GOTO “Contracts tab> Request for quote”.
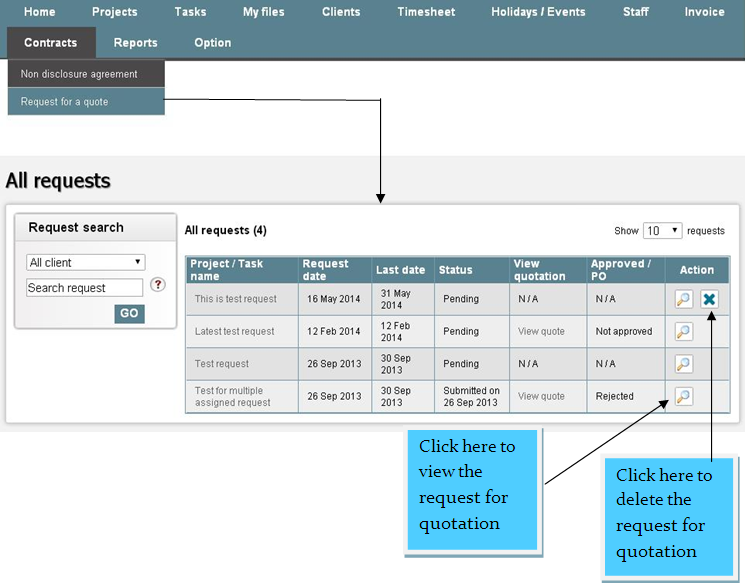
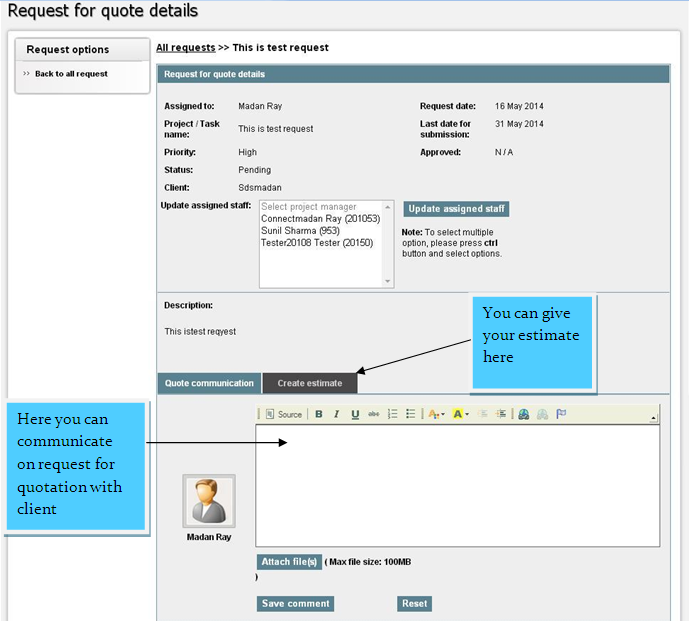
When you click on any request for quote the details of that quote get open, there you can communicate with the client and give your estimate for that quote.
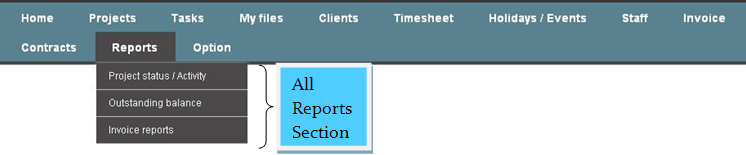
All Reports
CPMS keeps all your files and documents safe in one place so that you can access them easily. File management is also a good feature of this system to manage all your files and documents in organized way. In the Reports tab you can access all the reports very easily as-
Project status and activity reports
Outstanding balance reports
Invoice reports
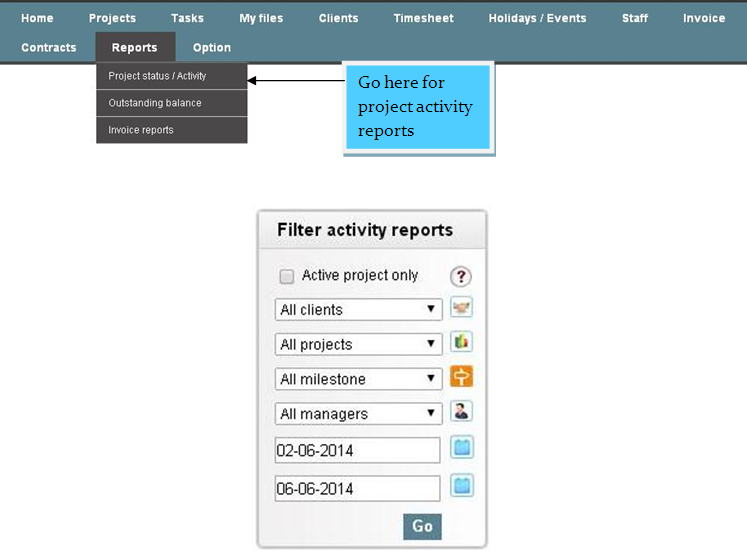
In the project activity reports you have various options or filters view the project activity reports by client name/ project name/ milestone/ manager name/ start and end date.
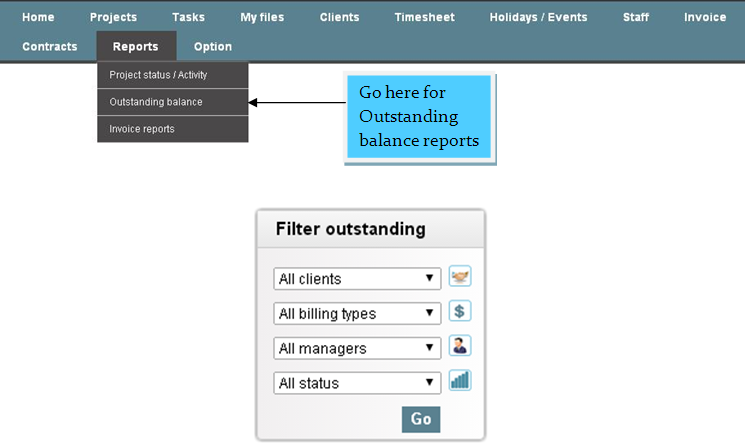
You can search outstanding balance reports by client name / billing type / manager name and status.
You can search invoice reports by client name / billing type / manager name and status.
.png)
Holidays and Events
GOTO: "Holidays/Events > Create a new group"
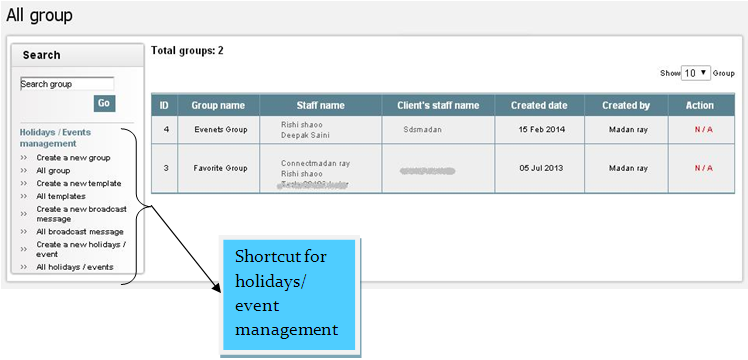
Here you can create a new group of members whom you want to invite to the event. Here is the list of all client staff and internal staff so you can select and add them in a group easily. Select the staff name and click on “Add” button. If you want to remove it from the group, select the name from right section and click on “Remove” button.
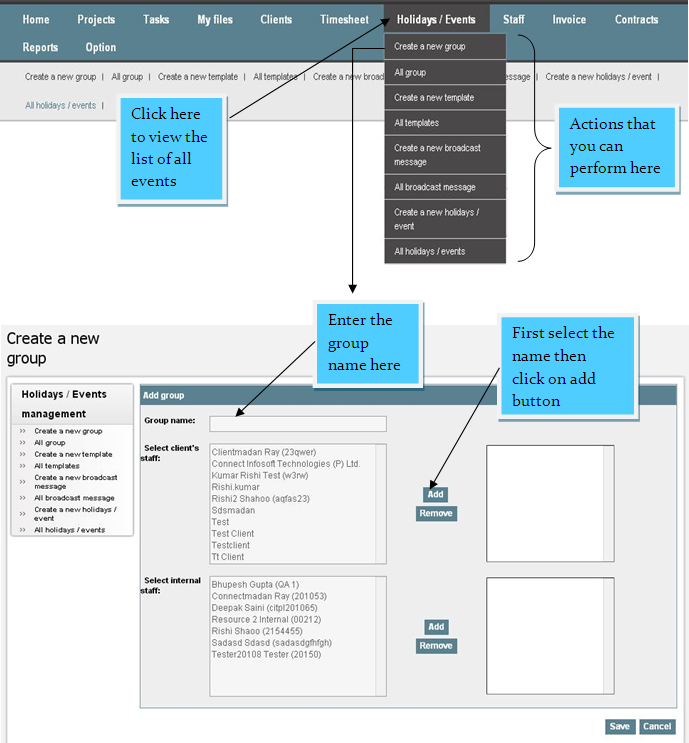
When you click on "Holidays/Events" tab, you can see the list of all events. Here you can edit or delete the group of any event.
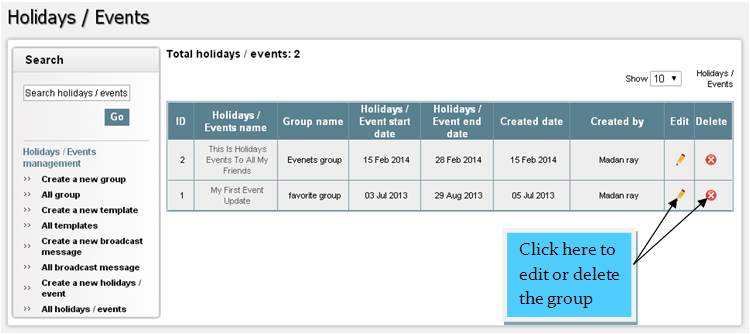
GOTO: "Holidays/Events > All group"
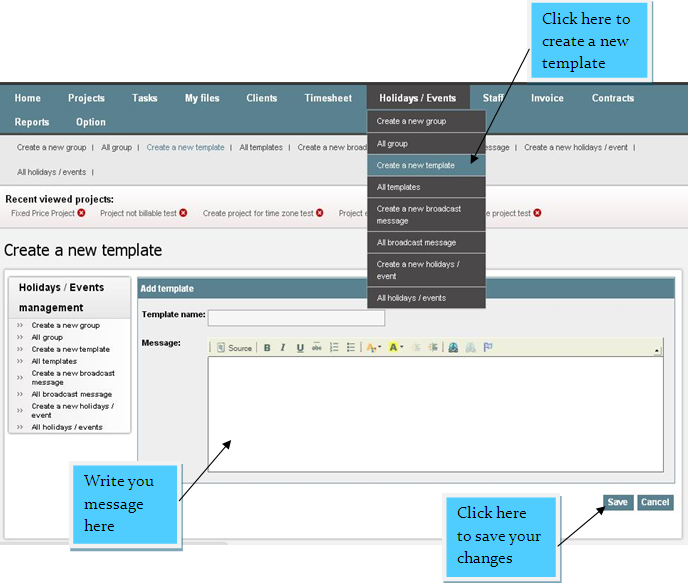
GOTO: "Holidays/Events > Create a new template"
Here you can create the email templates with message for every event or holidays and save it. Whenever you will create any event, an email with this template send to your event group members and you can edit or change it easily.
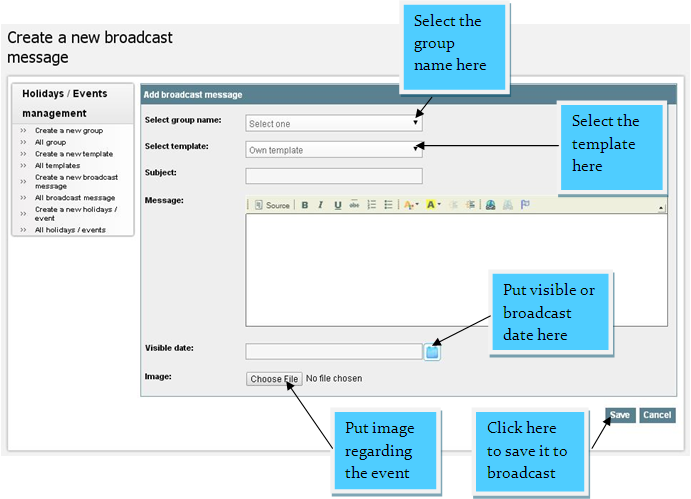
You can create any event or holiday in advance and it will get broadcast to the members on a particular date that you will fix in it.
GOTO: "Holidays/Events > Create a new broadcast message"
GOTO: "Holidays/Events > All broadcast messages"
Here is the list of all broadcast messages that will show to the a group member on coming date. You can edit or delete these messages before broadcasting.
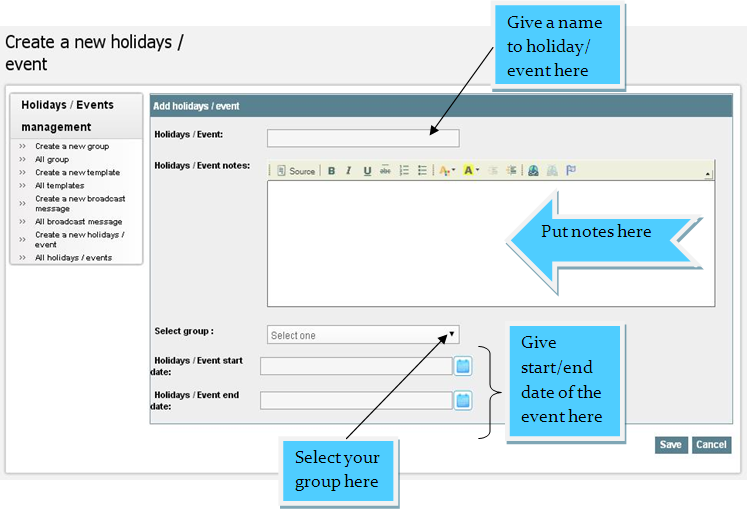
You have you groups, templates and message now create your holiday/event here. Just write holidays/event name, notes, select group, put start/end date and save.
GOTO: "Holidays/Events > Create a new holiday/event"
GOTO: "Holidays/Events > All holiday/event"
Here is the list of all events or holidays that had happened or would happen on coming date. You can edit or delete these events here.
Option and Settings
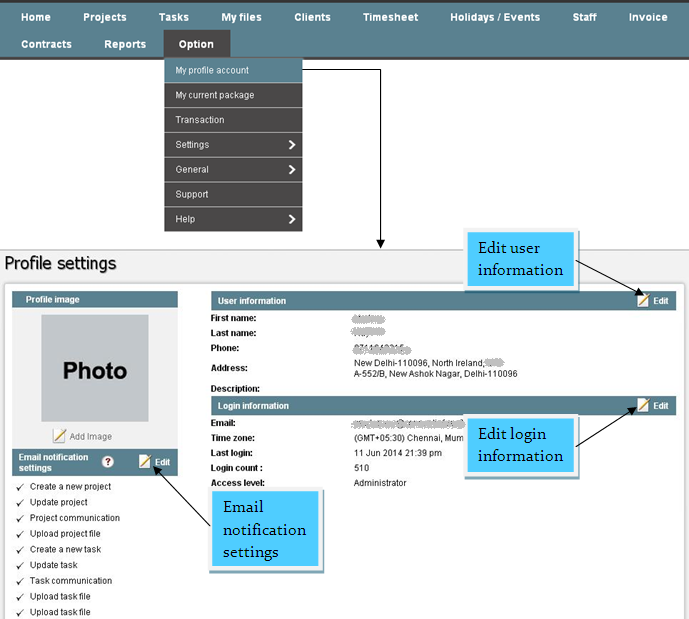
In the options tab there are various management and setting options to manage your account according to your use. To view and edit my profile account.
GOTO: "Option > My profile account"
GOTO: "Option > My current package"
Here you can view your current package details and according to your convenience, you can upgrade & downgrade your package of CPMS or cancel the service.
GOTO: "Option > Settings"
In the setting option, you get many more controls of your account. Here you find various options.
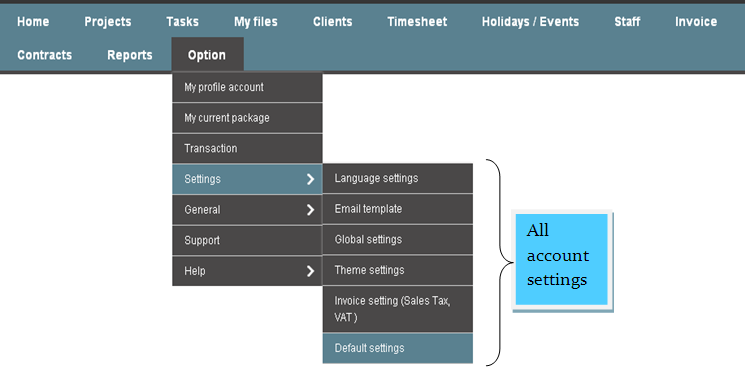
- Language settings
- Email template
- Global settings
- Theme settings
- Invoice setting (Sales Tax, VAT)
- Default settings
Change the language of your account according to your.
You can change the email template according to your business.
Here you can change the Permission settings of-
-Administrator
-Projects Manager
-Resource
-Clients
-Accounts Manager
Manage the theme settings of your account.
Here in the invoice setting, you can do some fix and defined settings. As-
-Invoice id prefix
-Invoice terms & conditions
-Tax name
-Tax percentage (%)
-Payment method
Here in default settings you are able to change the following –
-Default Time Zone
-Currency
-Language
-Logo settings
-Company Name
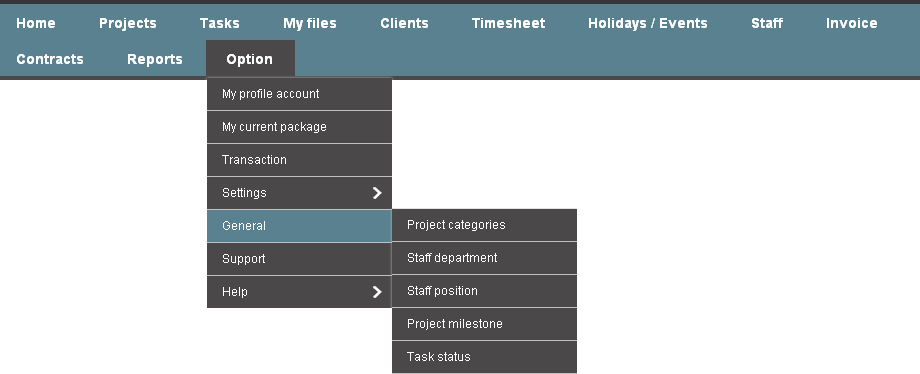
In the general settings you can manage (create, save, edit or delete) all your tasks, projects and staff settings. The main points that you can manage in general settings are-
- Project categories
- Staff department
- Staff position
- Project milestone
- Task Status
CPMS Packages & Plan
We have four different packages right now. These are “HAPPY PACKAGE”, “SILVER PACKAGE”, “GOLD PACKAGE”, and “PLATINUM PACKAGE”. The respective features of all packages can be found on our website. You can always start with the “HAPPY PACKAGE” which is a 60 day free trial pack and then you may upgrade it to any of the paid packages as per your need.
Yes, of course. You can change your plan any time if you feel the one you are using doesn’t suit you.
We accept all credit cards for payment.
You can create unlimited number of users, regardless of the package you are using.
All the users you create can be categorized as Administrator, Project manager, Resource, etc. Each category has different levels of access which can be completely controlled and modified by the administrator. Even the settings can be changed for individuals. This way you have the complete control of your account and information is shared with your team members as per your desire.
Our support system is there for you to help 24x7. You can contact us any time via email or phone call.
Connect With Us

Newsletter